
Choosing the Right Antibody for ChIP: A Validation Guide
Choose an antibody with documented ChIP-specific evidence, not just a clean Western blot, or plan a ChIP-qPCR pilot before committing to sequencing. A datasheet showing a sharp band on WB tells you the antibody recognizes its target in denatured protein. It tells you nothing about whether that same antibody will pull down native chromatin.
Trust three kinds of evidence on any datasheet: knockout or knockdown validation, an independent ChIP-seq track record, and a documented lot number tied to that data. Treat “ChIP-grade” claims backed only by WB or a peptide dot blot with real skepticism, since peptide-only screening misses a meaningful share of antibodies that later fail in chromatin.
Before you order anything, run through this:
- Confirm the lot number matches the lot used in any published validation data.
- Check host species and clonality against your downstream secondary antibody and bead system.
- Look for KO/knockdown data or an independent ChIP-seq dataset, not just IP.
Quick check: more than one in five antibodies that pass a peptide dot blot still fail to enrich target chromatin in a real ChIP.
Key Takeaways
The most reliable ChIP antibody selection strategy combines documented ChIP-specific evidence with a low-cost qPCR pilot before any sequencing commitment.
| Point | Details |
|---|---|
| Trust ChIP evidence over WB alone | Look for KO/knockdown data or independent ChIP tracks, not just a clean Western blot band. |
| Match format to target biology | Use monoclonals for consistency on abundant marks; consider polyclonals for binding capacity on low-abundance targets. |
| Run the ENCODE-style secondary check | Pair a primary WB/IP assay with at least one secondary assay: KO, peptide IP, or motif enrichment. |
| Pilot before you sequence | A 3 to 4 point titration across positive, mid, and negative loci catches bad antibodies for the cost of qPCR plates. |
| Document every lot number | Lot-level records let you catch performance drift between orders and match ENCODE documentation standards. |
| Source lot-tracked reagents | Mayflowerbio’s antibody catalog and peptide products support the documentation and secondary testing this workflow requires. |
Table of Contents
- Target Biology, Antibody Format, and Epitope Accessibility
- What Validation Assays Do Consortia Actually Require?
- How Do You Run a ChIP-qPCR Pilot Before Sequencing?
- Titration Range and Controls That Catch Non-Specific Pull-Down
- Does Sequencing Depth Change With Antibody Source?
- Troubleshooting a Weak or Failing Antibody
- Documenting Reagents for Reproducible ChIP Work
- Editorial Perspective: What the Data Actually Supports
- Get Lot-Tracked Antibodies and Peptides for ChIP Validation
- Sources
- FAQ
Target Biology, Antibody Format, and Epitope Accessibility
The target you’re chipping for changes almost everything about antibody selection. Transcription factors typically bind focal, low-abundance sites, so you need an antibody with high affinity and minimal background at low input. Histone post-translational modifications sit at the opposite extreme: abundant, genome-wide, but riddled with near-identical neighboring epitopes that invite cross-reactivity. An antibody raised against H3K4me3 can still bind H3K4me2 well enough to distort your peak calls.
Monoclonal and polyclonal formats trade off differently here. Monoclonals give you lot-to-lot consistency because they come from a single hybridoma clone, but they’re more vulnerable to a single point mutation or fixation artifact masking their one epitope. Polyclonals recognize multiple epitopes on the same target, which raises binding capacity and tolerance for partial epitope loss, but different lots can vary in the ratio of specific to nonspecific antibody. That variability is exactly why quantitative peptide immunoprecipitation matters: it measures apparent Kd and binding capacity directly instead of relying on a qualitative band.
Formaldehyde crosslinking and sonication or tagmentation both reshape the epitope landscape. Crosslinking can bury an epitope inside a protein-protein or protein-DNA complex; over-fragmentation can strip away the structural context an antibody needs to recognize its target at all.
- Match antibody format to target abundance before optimizing anything else.
- Test epitope accessibility under your actual fixation conditions, not the vendor’s default protocol.
Pro Tip: If a histone antibody works on native chromatin but fails after crosslinking, try shortening fixation time before switching antibodies entirely.
What Validation Assays Do Consortia Actually Require?
ENCODE and modENCODE built their framework around a simple idea: no single assay proves an antibody works for ChIP, so you stack independent lines of evidence. The ENCODE3 antibody characterization standard requires one primary assay plus at least one secondary assay, per lot.
- Primary assay: Western blot or IP-Western. A passing result shows a single band, or a band pattern matching known isoforms, at the expected molecular weight. This confirms specificity in denatured or native protein, but it says nothing about chromatin-bound behavior, which is why it can’t stand alone.
- Secondary assay, option A: knockout or knockdown comparison. ChIP signal should drop substantially in the KO/KD condition. ENCODE guidance treats roughly a 50% or greater reduction in ChIP signal as a meaningful pass.
- Secondary assay, option B: independent ChIP or epitope-tag comparison. Running the same antibody against a tagged version of the target, and comparing peak sets, catches antibodies that work in isolation but disagree with orthogonal methods.
- Secondary assay, option C: peptide dot blot or array, ideally paired with peptide IP. Arrays flag gross cross-reactivity; peptide IP adds the quantitative layer of apparent Kd and binding capacity that a dot blot can’t provide.
- Secondary assay, option D: mass spectrometry or motif enrichment. For transcription factors, motif enrichment against known binding sequences is a strong corroborating signal.
Consortium guidance treats vendor “ChIP-grade” labels as a starting point, not a verdict. Reproducible ChIP-seq depends on documenting the exact catalog number and lot used, because antibody characterization is a lot-specific exercise, not a product-line guarantee.
Write the lot number into your lab notebook and your methods section before you run a single pull-down. If the vendor swaps lots between your first and second order, that’s a new antibody as far as validation is concerned.
How Do You Run a ChIP-qPCR Pilot Before Sequencing?
A short ChIP-qPCR pilot catches a bad antibody for the cost of a few plates of qPCR instead of an entire sequencing run. Structure it around locus selection, titration, and clear pass/fail thresholds.
- Pick three categories of loci. Choose a strong positive locus with well-documented enrichment for your target, a mid-strength locus with moderate expected signal, and a negative locus with no expected binding, ideally a gene desert or a known silent region.
- Run a 3 to 4 point antibody titration. Hold chromatin input constant across all conditions and vary only the antibody amount, typically across a 2 to 4 fold range per step.
- Evaluate every locus at every titration point. Rising signal at positive loci alongside flat signal at negative loci indicates specificity. Rising signal everywhere signals background pull-down, not real enrichment.
- Apply a go/no-go threshold. A workable rule of thumb: proceed to sequencing only when fold enrichment over IgG or input at the strong positive locus clears roughly 5 to 10 fold, background at the negative locus stays flat, and biological replicates agree within a narrow range.
Quick check: antibodies that pass this pilot rarely produce the kind of low-quality ChIP-seq data that requires deep re-sequencing to salvage.
Titration Range and Controls That Catch Non-Specific Pull-Down
Most ChIP protocols start antibody titration somewhere between 1 and 10 micrograms per reaction, adjusted for chromatin input and antibody affinity. Watch both directions as you titrate: if background at negative loci climbs alongside signal at positive loci, you’ve likely saturated available binding sites and started pulling down nonspecific complexes. If positive-locus signal plateaus while background stays flat, you’ve found your working range.
Every ChIP experiment needs five reference points to interpret results honestly:
- Input chromatin, sampled before immunoprecipitation, to normalize enrichment.
- Negative control loci with no expected binding for your target.
- IgG control, matched to host species, where nonspecific antibody behavior is a concern.
- Positive control loci with known, well-documented enrichment.
- Biological replicates, run independently, not just technical duplicates of the same chromatin prep.
Pro Tip: If background rises across every locus regardless of antibody amount, suspect your beads before your antibody. Try pre-blocking beads with BSA or switching to a different bead chemistry.
Does Sequencing Depth Change With Antibody Source?
Yes, and the effect is larger than most labs assume. Sharp, focal marks like transcription factor peaks or H3K4me3 generally need less depth to call peaks reliably, while broad marks like H3K27me3 or H3K9me3 need substantially more reads to distinguish signal from noise across large domains.
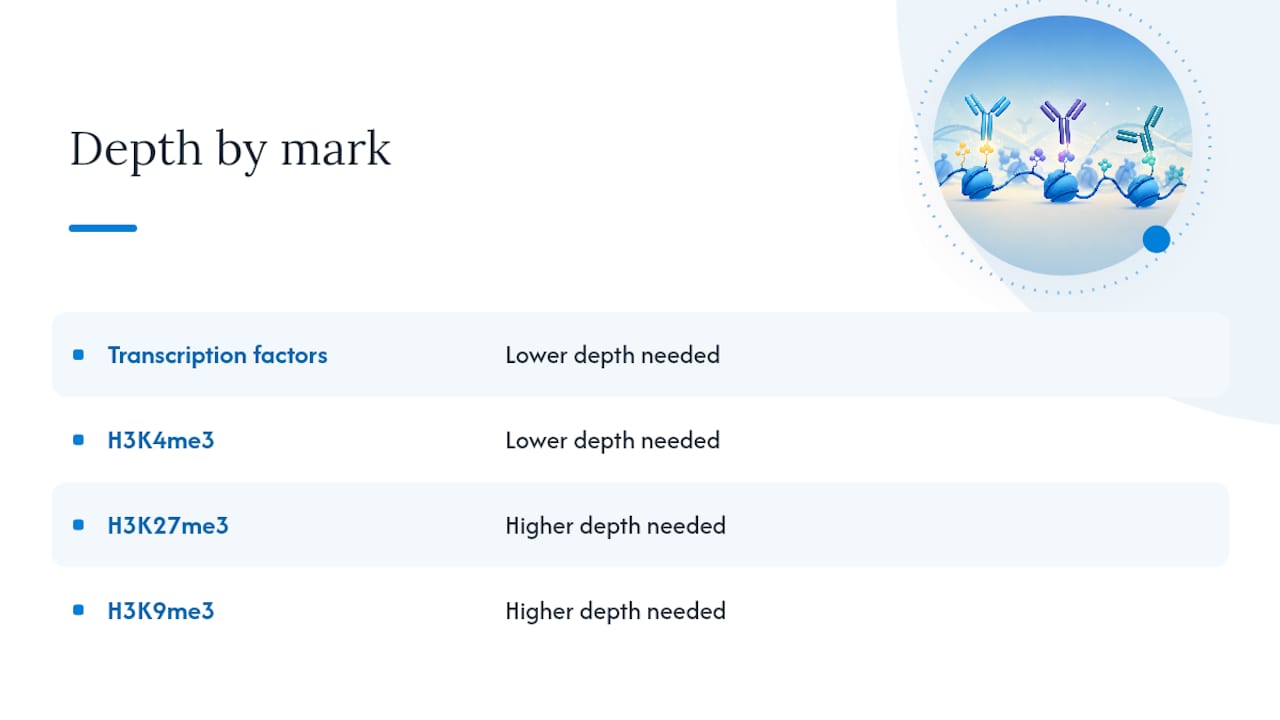
Antibody source interacts with depth in a way that’s easy to miss. Analysis of more than 28,000 public ChIP-seq datasets found that some antibodies required a high sequencing depth to reach top quality grades, while others reached the same grade at lower depth, depending on the vendor and lot (https://pmc.ncbi.nlm.nih.gov/articles/PMC4893979/). Replicate concordance measures, including IDR (irreproducible discovery rate) and the QCi quality-grading system, give you a way to check whether a weak antibody is being propped up by brute-force sequencing rather than genuine specificity. When an antibody’s track record is uncertain, run a shallow pilot sequencing lane first. Committing to full depth on an unproven antibody risks paying for reads that a better-validated reagent would have made unnecessary.
Troubleshooting a Weak or Failing Antibody
When enrichment falls short of your pilot thresholds, work through diagnostics before assuming the antibody is unusable. Start cheap and reversible; escalate only when the cheap fixes fail.
- Re-run a Western blot on the exact lot in hand to confirm banding hasn’t changed since the original validation.
- Try peptide competition to check whether a specific peptide blocks pull-down, confirming the antibody’s binding is epitope-driven rather than nonspecific.
- Adjust crosslinking time or switch fixation chemistry if you suspect the epitope is buried.
- Alter sonication or tagmentation conditions to change fragment size and epitope exposure.
- Order a second lot before abandoning the antibody entirely, since lot-to-lot variation in binding capacity and specificity is well documented even within the same catalog number.
- If two lots both underperform, consider an epitope-tag strategy: tag the target and use a well-characterized anti-tag antibody instead of chasing a difficult native epitope indefinitely.
Weigh the cost of one more optimization round against the cost of switching strategies. A day of troubleshooting is cheap. A failed sequencing run is not.
Documenting Reagents for Reproducible ChIP Work
Consortium-level review expects a documented paper trail: catalog number, lot number, and the specific validation assays run against that lot. That documentation is what turns a one-off result into something another lab can reproduce.
Mayflowerbio’s antibody catalog supports that workflow with lot-tracked reagents suited to ChIP validation panels. For peptide-based secondary tests, a biotinylated peptide library or a modification-specific peptide gives you the competition or dot-blot material ENCODE-style secondary validation calls for. Mayflowerbio’s US-based team handles technical questions on lot documentation and reagent selection directly.

Editorial Perspective: What the Data Actually Supports
Most labs treat antibody validation as a box to check once, early, and then forget; however, as discussed in Moving beyond R-CHOP in large B-cell lymphoma, ongoing validation is crucial for translational relevance. The evidence says the opposite: validation is lot-specific and ongoing, and the biggest failures happen when a lab reuses old validation data against a new lot without re-checking anything. That’s not a hypothetical risk. Peptide IP data shows lot-to-lot swings in binding capacity large enough to turn a working ChIP protocol into a failing one overnight.
The conventional advice, “buy a ChIP-grade antibody,” undersells how much work “ChIP-grade” is actually doing on a label. It’s a marketing term more often than a validated claim. What the ENCODE framework gets right is refusing to accept any single assay as sufficient. Western blot confirms the antibody recognizes its target; it says nothing about chromatin behavior.
If you take one thing from this: prioritize the ChIP-qPCR pilot over any datasheet claim. It’s cheap, fast, and it tells you what actually matters, whether this exact lot pulls down your exact target under your exact conditions. Everything else is a proxy.
Get Lot-Tracked Antibodies and Peptides for ChIP Validation
Running the validation panel this article lays out means sourcing reagents you can actually document, lot by lot, without gaps. Mayflowerbio built its antibody catalog and peptide product lines around exactly that need: researchers who need a specific lot tied to specific validation data, not a generic “ChIP-grade” label with nothing behind it.

For labs running peptide competition or dot-blot secondary assays, Mayflowerbio’s peptide library and modification-specific peptide products slot directly into the ENCODE-style panel described above. If you’re also optimizing assay sensitivity around a new target, the guidance on designing molecular assays for higher sensitivity covers the same titration logic from a broader angle. Browse the antibody catalog now to find a lot-documented reagent for your next pilot, or reach out to Mayflowerbio’s US-based technical support team with questions about matching an antibody to your specific target and fixation protocol.
Sources
- Broad ranges of affinity and specificity of anti-histone antibodies revealed by a quantitative peptide immunoprecipitation assay
- Antibody characterization ENCODE3 (February 2014)
FAQ
What Is the Difference Between Primary and Secondary Antibody Validation for ChIP?
Primary validation is a Western blot or IP-Western confirming the antibody recognizes its target protein. Secondary validation, required by ENCODE standards, adds independent evidence like knockdown comparison, peptide IP, or motif enrichment.
Should I Choose a Monoclonal or Polyclonal Antibody for ChIP?
Monoclonals offer lot-to-lot consistency and work well for abundant, well-defined epitopes, while polyclonals offer higher binding capacity and tolerate partial epitope masking, making them useful for low-abundance targets or difficult fixation conditions.
How Much Antibody Should I Use for a ChIP Titration?
Most protocols start titration between 1 and 10 micrograms per reaction across 3 to 4 points, holding chromatin input constant and watching for rising background at negative loci as a sign of saturation.
How Many Sequencing Reads Do I Need for ChIP-Seq?
Sharp, focal marks generally need fewer reads than broad histone marks, but antibody source and lot can shift required depth significantly, which is why a pilot ChIP-qPCR run before sequencing is worth the time.
What Should I Do if My ChIP Antibody Fails to Enrich Target Chromatin?
Re-test the same lot with a fresh Western blot and peptide competition first, then try a different lot before considering an epitope-tag strategy with a well-characterized anti-tag antibody as a fallback.