Start With Controls: Multiplex Assay Troubleshooting for Bench Triage
When a multiplex run goes bad, start with controls, not the whole panel. Compare your NTCs and low, medium, and high QCs against expected ranges, check instrument status (wash manifold, PMT/voltage, alarms), and confirm reagent lot and expiry before touching anything else. If only one analyte fails, run it singleplex or use a missing-man test before you burn another full panel on a repeat.
TL;DR:
- Troubleshoot bead-based multiplex failures by checking controls, instrument status, reagent lot, and expiry before making any physical adjustments.
- Low bead count requires gentle mixing and inspection for clogs or air bubbles, while high background often needs increased blocking or detergent use.
- To fix unequal amplification in multiplex PCR, optimize primer concentrations and annealing temperatures instead of increasing template or cycle numbers.
- Validation demands a complete control set including QC, singleplex controls, no-template controls, and missing-man tests to detect cross-reactivity and reagent issues.
- Sample collection methods, transport media, and handling significantly impact multiplex assay performance, with sensitivity loss potential up to fivefold compared to monoplex formats.
Table of Contents
- What Causes Bead-Based Multiplex Immunoassay Failures?
- How Do You Fix Unequal Amplification in Multiplex PCR?
- What Controls Do You Need for Multiplex Assay Validation?
- How Does Sample Collection Affect Multiplex Assay Performance?
- Instrument, Plate, and Wash Troubleshooting
- How Do You Correct Batch and Plate Effects in Multiplex Data?
- Where to Find Multiplex Assay Design and Protocol Support
- Author Perspective: A Practical Triage Order
- Reagents and Technical Support for Multiplex Assay Troubleshooting
- Sources
- FAQ
What Causes Bead-Based Multiplex Immunoassay Failures?
Low bead count, high background, and cross-reactivity account for most bead-based multiplex assay problems, and each has a distinct fix rather than a universal one. Suspension arrays like Luminex and plate-based bead formats fail in recognizable patterns once you know what to look for.
Low bead count usually traces back to aggressive washing, under-resuspension, or beads sitting too long before acquisition. Vortex or sonicate briefly before every read, confirm your wash manifold isn’t over-aspirating, and check that bead pellets haven’t dried out during incubation. If counts drop only in specific wells, suspect a clogged probe or an air bubble in that channel rather than a reagent problem.
High background and nonspecific binding are the more stubborn issues. Antibody-based multiplex platforms are inherently more prone to cross-reactivity and elevated background than monoplex assays, and sensitivity can fall noticeably once you multiplex, which is exactly why validation has to be rigorous before you trust a panel’s output. A few fixes, in order of how often they work:
- Increase blocking buffer concentration or switch to a heterophilic blocking reagent if you’re working with human serum or plasma.
- Add or increase detergent (Tween-20 is standard) in wash buffers to strip weakly bound nonspecific material.
- Dilute sticky samples further; lipemic or hemolyzed specimens often need 2 to 4 times the standard dilution before background clears.
- Include unlabeled and highest-labeled bead populations as negative controls, since the fluorescent dyes themselves can contribute to nonspecific binding.
For suspected cross-reactivity, the missing-man test is the fastest isolation method: run the panel with one analyte omitted at a time. If the missing analyte still produces signal from its expected wells, you have real cross-reactivity, not assay noise, and the panel needs reconfiguration or that analyte needs to move to a singleplex format.
Washing itself deserves attention. Set vacuum pressure conservatively on filter plates, since excessive aspiration tears membranes and drags beads out with the wash buffer. Resuspend beads with a gentle plate tap or orbital shake rather than repeated pipetting, which shears bead-antibody complexes over time.
Pro Tip: Keep a small aliquot of your original bead master mix in reserve every run. If a plate fails and you’re not sure whether the problem is bead-related or sample-related, a quick side-by-side with fresh master mix settles the question in one extra plate instead of a full re-optimization.
How Do You Fix Unequal Amplification in Multiplex PCR?
Mismatched primer efficiencies, not template amount, cause most unequal amplification in multiplex PCR, and the fix is titration, not brute force. Increasing template concentration or cycle number to rescue a weak amplicon typically backfires by encouraging primer-dimer formation in the stronger reactions.
- Titrate primer concentrations individually. Drop the concentration of primers producing dominant amplicons and raise the weaker ones incrementally, testing in 0.1 to 0.2 micromolar steps until band intensities balance.
- Optimize annealing temperature and Mg2+/dNTP ratios before touching primer design. A 2 to 3 degree Celsius shift in annealing temperature can resolve amplification imbalance that looks like a primer problem but is actually a thermal one.
- Switch to a hot-start enzyme if primer-dimers persist. Hot-start formulations suppress nonspecific extension during setup, which is often when dimers form in multiplex reactions with several primer pairs competing in the same tube.
- Redesign overlapping primers if dimers keep showing up in the same primer pair combination across multiple optimization attempts. A tagged or chimeric primer approach can shortcut a lot of that iterative work.
For contamination versus true low-level signal, don’t treat a high Ct value as a verdict on its own. High Ct results can reflect environmental contamination as easily as genuine low-abundance target, and clinical or contextual correlation matters more than the number alone. Run your no-template controls in the same batch, not a separate one, and if contamination shows up there, the high Ct result upstream is suspect regardless of how clean the rest of the plate looks.
ddPCR runs into a different failure mode: droplet saturation. Dilute samples enough to keep positive droplet fractions below saturation thresholds, since ddPCR’s tolerance for inhibitors and low-abundance targets only helps if your threshold-setting and NTC strategy are solid. Set thresholds using your negative control cluster, not a fixed value carried over from a previous kit lot.
Pro Tip: Run a standardized template mix across every primer pair before you ever titrate. It tells you within one plate whether you’re chasing a real primer-efficiency mismatch or an artifact from uneven starting material.
What Controls Do You Need for Multiplex Assay Validation?
A minimal but complete control set for multiplex assay troubleshooting includes low, medium, and high QC samples, no-template or blank controls, and singleplex controls for every analyte in the panel. Skipping any one of these makes it impossible to tell whether a failing result is the panel’s fault or the sample’s.
- QC ladder (low/med/high): run every plate against known concentrations spanning your assay’s dynamic range, not just a midpoint control.
- Singleplex controls: for any analyte behaving oddly in the multiplex format, a same-day singleplex run tells you whether the problem is intrinsic to that antibody pair or a multiplexing artifact.
- NTCs and blanks: placed in the same batch as your samples, never run separately, so contamination signals surface where they’ll actually matter.
- Missing-man controls: built into validation, not just troubleshooting, to catch cross-reactivity before it shows up as a bad production run.
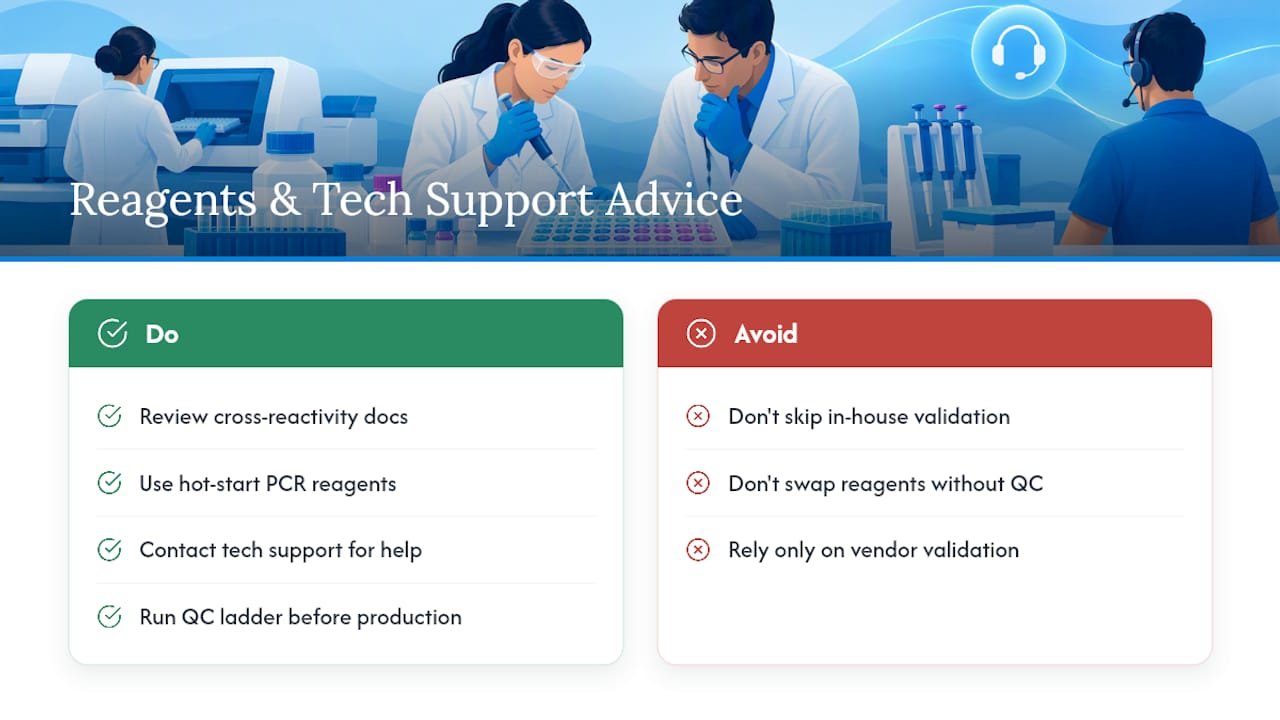
Minimum required dilution (MRD) determines how far you can dilute a sample before matrix interference disappears without losing sensitivity to your target. If spike-recovery experiments show poor recovery at your current dilution, that’s your signal to increase MRD rather than tolerate a systematically biased result. Reviewing manufacturer cross-reactivity and validation data before you even start is one of the more overlooked recommendations here. Vendors publish validation and feasibility data that can save a lab weeks of redundant bench work if you review it before assuming your protocol is the problem.
Lot-to-lot bridging matters more than most labs budget for. Order enough of a working lot to cover your full study or production run when possible, and when a lot change is unavoidable, run bridging samples across old and new lots side by side before switching entirely. A lot change that shifts your QC values by even a small margin can look like assay drift if you haven’t bridged it first.
For decision rules: reject an entire panel only when a shared reagent or process (wash buffer, plate lot, instrument run) is implicated across multiple analytes. If one analyte fails while others pass QC cleanly, accept the passing analytes and flag the failing one for singleplex confirmation rather than discarding a whole plate’s worth of valid data. Document every deviation, control value, and reprocessing decision. That log is what makes a corrected or partially accepted dataset defensible later.
How Does Sample Collection Affect Multiplex Assay Performance?
Swab material and transport medium choice affect multiplex assay results before the sample ever reaches your bench. Cotton-tipped and calcium alginate swabs leave residues that inhibit PCR amplification, so nylon-flocked or polyester swabs are the standard recommendation, with nasopharyngeal aspirates preferred where feasible for respiratory specimens.
- Choose dry or semisolid transport media over liquid formats when contamination risk during handling is a concern.
- Process specimens in batches that minimize cross-contact between high-titer and low-titer samples on the same bench run.
- Run a dilution series and spike-and-recovery experiment on any new sample matrix before trusting recovery values at face value.
- Limit freeze-thaw cycles to one or two; repeated cycles degrade both protein targets in immunoassays and nucleic acid integrity in molecular assays.
Sensitivity losses from multiplexing alone can range from 1.7 to 5-fold compared with monoplex formats depending on the platform and cross-reactivity profile, which means a matrix effect that would be tolerable in a single-analyte assay can push a multiplex panel below its limit of detection. A dilution series that looks fine on paper sometimes fails in practice simply because the multiplex format had less headroom to begin with.
Instrument, Plate, and Wash Troubleshooting
Plate washers cause a disproportionate share of “mystery” multiplex failures. Check vacuum settings before assuming a reagent problem: over-aspiration tears filter plate membranes and drags beads out with the wash stream, while under-aspiration leaves residual wash buffer that inflates background.
- Inspect the wash manifold for clogged needles or misalignment if specific wells consistently underperform.
- Handle filter plates gently during blotting steps; a firm tap-dry is safer than any mechanical blotting that risks membrane tears.
- Adjust PMT voltage only when your dynamic range is genuinely compressed, since raising it to rescue a weak signal also amplifies background noise.
- Treat instrument alarms in two tiers: dirt, clogs, and calibration drift are same-day fixes; laser or detector faults need vendor service before you trust another run.
How Do You Correct Batch and Plate Effects in Multiplex Data?
Control coefficient of variation (CV) is your fastest diagnostic. Plot control values across plates as boxplots or heatmaps; a visible shift or increased spread between batches signals a plate or lot effect before you ever look at sample data.
- Flag any plate where control CVs exceed your established acceptance threshold before analyzing sample results from that plate.
- Apply R-based correction tools using local polynomial regression when a rerun isn’t feasible and the batch imbalance is documented and moderate, not severe.
- Keep raw, uncorrected data alongside any corrected dataset, with a documented rationale for every adjustment made.
Corrected data are acceptable for downstream use when the correction addresses a known, bounded artifact and the raw data remain available for audit. They are not acceptable as a substitute for rerunning a plate where the underlying cause of the artifact is unidentified.
Pro Tip: Build your control heatmap before you build anything else. A pattern that jumps out visually across 12 plates can save hours compared to spotting the same drift row by row in a spreadsheet.
Where to Find Multiplex Assay Design and Protocol Support
Mayflowerbio maintains protocol resources for teams working through multiplex assay design questions, including guidance for panel configuration and reagent selection alongside the AimPlex™ multiplex assay product line and PCR reagent catalog. Technical support covers protocol troubleshooting and reagent selection questions tied directly to the checks above, from primer redesign to bead control setup. Whatever you change, validate it locally before rolling it into production, and keep a change log. A fix that works on one lot or one instrument doesn’t automatically transfer to the next.
Author Perspective: A Practical Triage Order
Work controls first, then sample, then instrument, then reagents, then redesign. Escalate to vendor support or singleplex revalidation the moment cross-reactivity is confirmed. Conservative interpretation and a clean audit trail matter more than a fast fix.
— Alina
Reagents and Technical Support for Multiplex Assay Troubleshooting
If your panel keeps failing the same way despite careful troubleshooting, the reagents themselves may be the limiting factor rather than your protocol. Mayflowerbio’s AimPlex™ multiplex assays come with cross-reactivity and validation documentation you can review before committing bench time to a redesign, and the PCR reagent catalog includes hot-start formulations relevant to the primer-dimer issues covered above.
Technical support is available for protocol troubleshooting and reagent selection questions, whether you’re rebalancing a multiplex PCR panel or reconfiguring a bead-based immunoassay after a missing-man test flagged cross-reactivity. Mayflowerbio does not replace in-house validation. Any reagent swap or protocol change should still go through your own QC ladder before it touches production samples. Browse the full reagent and assay catalog to compare options against what’s currently failing on your bench, and reach out for a protocol consultation before your next optimization run.
This article is general information, not a substitute for advice from a qualified doctor. Consult a qualified healthcare professional about your own circumstances before acting on anything here.
Sources
- Best Practices for Use of Polymerase Chain Reaction for Diagnosing Pertussis | CDC
- Multiplex bead binding assays using off-the-shelf components (PMC)
FAQ
What Is the First Step in Multiplex Assay Troubleshooting?
Check your controls before touching samples or reagents. NTCs, QC ladders, and singleplex controls tell you within one run whether the failure is systemic (instrument, reagent lot) or isolated to one analyte or sample.
How Do You Know if Cross-Reactivity Is Causing Assay Failure?
Run a missing-man test by omitting one analyte at a time from the panel. If signal still appears where that analyte was excluded, cross-reactivity is confirmed and the panel needs reconfiguration.
Why Does Multiplexing Reduce Assay Sensitivity Compared to Monoplex?
Multiplexing introduces competition for reagents and binding sites plus a higher risk of cross-reactivity, which can lower sensitivity by 1.7 to 5-fold depending on the platform and panel design.
Can You Fix Bad Multiplex Data Without Rerunning the Plate?
Sometimes. R-based statistical corrections using local polynomial regression can address documented plate or batch artifacts, but only when the cause is identified and the imbalance is moderate, not when the underlying failure is unclear.
Does Mayflowerbio Offer Multiplex Assay Kits and Support?
Yes. Mayflowerbio offers AimPlex™ multiplex assays along with PCR reagents and technical consultation for protocol setup and troubleshooting; current pricing is listed on the product pages.