Fix Most Failed ChIP Experiments: Start With Chromatin QC
Most failed ChIP experiments are fixed by confirming chromatin quality, validating the antibody, and removing PCR inhibitors, in that order. Low yield usually means reprepare your chromatin, high background usually means tighten washes and recheck antibody specificity, and no product usually means check for PCR inhibitors and run a positive control. Antibody and molecular biology resources can help confirm reagent quality before you repeat a run.
TL;DR:
- Proper chromatin shearing, with fragment sizes between 150 and 300 base pairs, is crucial for reliable ChIP-seq or ChIP-qPCR results and depends on optimizing sonication conditions.
- Validating antibodies through multiple techniques, including knockdown or orthogonal antibodies, is essential, as many commercial antibodies fail at the ChIP step despite passing Western blot or immunofluorescence tests.
- Mock IP controls are more beneficial than input alone when working with complex tissue samples, especially to distinguish genuine signals from background noise caused by chromatin accessibility.
- Ensuring reagents like formaldehyde, antibodies, and buffers are fresh and correctly prepared prevents experimental variability and improves overall chromatin quality and immunoprecipitation specificity.
- Troubleshooting should prioritize correcting chromatin quality and antibody validation before considering protocol overhaul or switching to alternative strategies like epitope tagging or CUT&RUN.
Table of Contents
- Expected chromatin yield and fast QC checks
- Fragmentation troubleshooting: sonication, enzymes, and shear size
- How to pick and validate ChIP antibodies
- Which controls to run and what the QC metrics tell you
- Symptom to cause to fix: a bench troubleshooting checklist
- Practical bench notes and where to check reagent quality
- Buffer compositions and their role in IP specificity and yield
- Minimizing background noise and non-specific binding
- Sample and reagent handling to prevent degradation
- Troubleshooting differences between cell lines and tissue samples
- When to stop optimizing and change strategy
- Where to find validated antibodies and ChIP reagents
- FAQ
- Sources
Expected chromatin yield and fast QC checks
Before touching antibody or wash conditions, confirm your chromatin is usable. A typical ChIP prep from a standard cultured cell line or 25 milligrams of tissue should yield enough DNA for several immunoprecipitations plus input, though exact amounts vary by cell type, crosslinking efficiency, and lysis method. Rather than chasing a universal number, check these readouts:
- Concentration: quantify with PicoGreen or a fluorometric assay rather than NanoDrop alone, since protein and RNA contamination inflate absorbance readings.
- Fragment size: run a Bioanalyzer, TapeStation, or 1.5% agarose gel; a smear concentrated in your target range (not a tight single band, not a genomic smear) signals good shearing.
- Visual check: a cloudy or viscous lysate after sonication often means incomplete lysis or insufficient shearing cycles.
A chromatin prep that shows a diffuse smear outside the target fragment range, rather than a defined peak, is the single most common reason a ChIP fails before the antibody step is even reached. If your gel or Bioanalyzer trace looks wrong, re-extract and re-shear before you touch antibody conditions. If it looks right, move on to fragmentation fine-tuning or straight to the antibody step.
Fragmentation troubleshooting: sonication, enzymes, and shear size
Fragment size drives everything downstream. ChIP-seq generally wants 150 to 300 base pairs; ChIP-qPCR tolerates a wider window as long as your amplicon falls inside the sheared range. Getting there reliably takes iteration, not a fixed recipe, because shearing efficiency depends on cell type, crosslinking time, and even tube brand.
- Run a pilot sonication matrix. Vary time and power across a small set of samples, then check each on a gel or Bioanalyzer before committing your full sample set.
- Respect volume limits. Overloaded tubes shear unevenly, leaving a mix of over- and under-digested chromatin in the same prep.
- Choose your method by target. Native histone ChIP generally favors MNase digestion, which needs careful titration since over-digestion destroys nucleosome-level resolution; transcription factor ChIP generally favors sonication, which gives more uniform fragment pools across a crosslinked chromatin prep.
- Rule out reagent age. Degraded formaldehyde crosslinks poorly and produces chromatin that shears unpredictably regardless of sonicator settings.
Inconsistent shearing across replicates often traces back to inconsistent lysis rather than the sonicator itself. Document sonicator model, tube type, and fill volume for every batch so a bad result is traceable to a specific variable rather than treated as random noise.
Pro Tip: When chromatin resists even shearing, try preparing nuclei before fixation, or reduce the SDS concentration going into the immunoprecipitation step, to balance shearing efficiency against antibody compatibility.
How to pick and validate ChIP antibodies
Antibody quality is the single largest determinant of ChIP-seq data quality, and it is also the step most labs underinvest in before scaling up a project. A prioritized validation workflow saves weeks of wasted sequencing runs.
Primary checks, done before you ever touch chromatin from your experimental samples:
- Western blot or IP-western to confirm the antibody recognizes a protein of the expected size, accepting that multiple bands can be acceptable if the extra bands are clearly non-nuclear.
- Immunofluorescence to confirm expected subcellular localization, particularly for nuclear or chromatin-associated targets.
Secondary checks, run when primary characterization looks clean but ChIP performance is still uncertain:
- Knockdown or knockout validation, confirming signal disappears when the target protein is depleted.
- An independent antibody against a different epitope, or an epitope-tagged version of the protein, to cross-confirm specificity.
- Motif enrichment analysis on top peaks, or mass spectrometry, when a transcription factor’s binding motif is known.
Many antibodies that pass Western blot and immunofluorescence still fail at the ChIP step, which is why secondary validation strategies including knockdown, orthogonal antibodies, and epitope tagging are described as necessary rather than optional. The same analysis found that only a minority of commercially available transcription factor antibodies pass both preliminary characterization and ChIP-seq functionality testing, which is a strong argument for budgeting validation time into any new project rather than assuming a vendor’s datasheet settles the question.
The practical bench rule: test candidate antibodies by ChIP-qPCR at several positive-control loci before committing to a full ChIP-seq run, since antibodies showing several-fold or greater enrichment across multiple loci generally perform well in sequencing applications. Track lot numbers and validation results in your lab notebook, because antibody performance can shift between lots even from the same vendor and catalog number.
Which controls to run and what the QC metrics tell you
Every ChIP experiment needs a comparison point, and the choice between input and mock IP changes what kind of noise you catch. DNA input, meaning chromatin that skips the immunoprecipitation step entirely, is the standard baseline and works well for straightforward cultured cell lines. Mock IP, run with a non-specific IgG in place of the target antibody, adds a second layer of protection.
- Input alone is simpler and sufficient for many cell-line experiments where background is already low and consistent.
- Mock IP catches antibody-independent pulldown artifacts and is particularly useful in complex tissue samples or any sample with high baseline chromatin accessibility.
- Mock IP combined with DNA input improves binding-site detection in complex tissue samples compared with input alone, though input remains adequate for most simple cell-line work.
Once sequencing data is in hand, a handful of metrics flag whether the run is trustworthy. ENCODE and modENCODE guidelines call for duplicate biological replicates, a fraction of reads in peaks (FRiP) benchmark around 1%, and normalized and relative strand cross-correlation (NSC and RSC) scores paired with irreproducible discovery rate (IDR) analysis across replicates. An NSC below 1.05 or RSC below 0.8 is generally treated as a signal to repeat the experiment or investigate further rather than proceed to publication. When FRiP comes back low or cross-correlation looks poor, the fastest fixes are repeating the IP with a freshly validated antibody lot, adding biological replicates, or increasing sequencing depth before concluding the target simply lacks strong binding sites.
Symptom to cause to fix: a bench troubleshooting checklist
When a run goes wrong, work through symptoms in order of how much time each diagnostic costs you.
- Low DNA yield: verify chromatin concentration by PicoGreen first. If chromatin input was adequate, suspect antibody inefficiency or insufficient incubation time before reworking the entire prep.
- Fragments too large: increase sonication cycles incrementally and recheck on a gel rather than jumping straight to a longer single run, which risks overshooting into degradation.
- Fragments too small: reduce sonication time or power, and check whether crosslinking was excessive, since overfixed chromatin shears unpredictably.
- High background: tighten wash stringency, confirm antibody specificity by immunoprecipitating with IgG in parallel, and extend RNase digestion, since incomplete crosslink reversal, spin-column protein retention, and insufficient RNase treatment are documented causes of elevated ChIP background.
- No product on qPCR or sequencing: check for PCR inhibitors before assuming the antibody failed.
- Positive control failure: repeat with a freshly validated antibody lot; if the positive control still fails, suspect chromatin quality rather than the antibody.
- Low library complexity or high duplicate rates: increase starting chromatin input and reduce PCR amplification cycles during library preparation.
For PCR inhibition specifically, spin-column purification after reverse crosslinking removes residual detergents and elution-buffer components more reliably than phenol-chloroform extraction for downstream qPCR performance. If cleanup alone does not resolve the problem, repeat reverse crosslinking with fresh proteinase K before escalating to antibody replacement or an orthogonal method like epitope tagging.
Practical bench notes and where to check reagent quality
A few habits prevent problems before they start:
- Replace formaldehyde stocks on a defined schedule rather than by appearance alone, since degraded formaldehyde crosslinks unevenly and produces chromatin that shears unpredictably.
- Extend RNase digestion when background looks high on sequencing tracks, since residual RNA is a documented contributor to false-positive signal.
- Avoid leaving samples in spin columns longer than necessary during wash steps, since prolonged retention can reintroduce bound protein into the eluate.
Antibody and other molecular biology reagent listings can be referenced when sourcing replacement lots for a failed validation step.
Buffer compositions and their role in IP specificity and yield
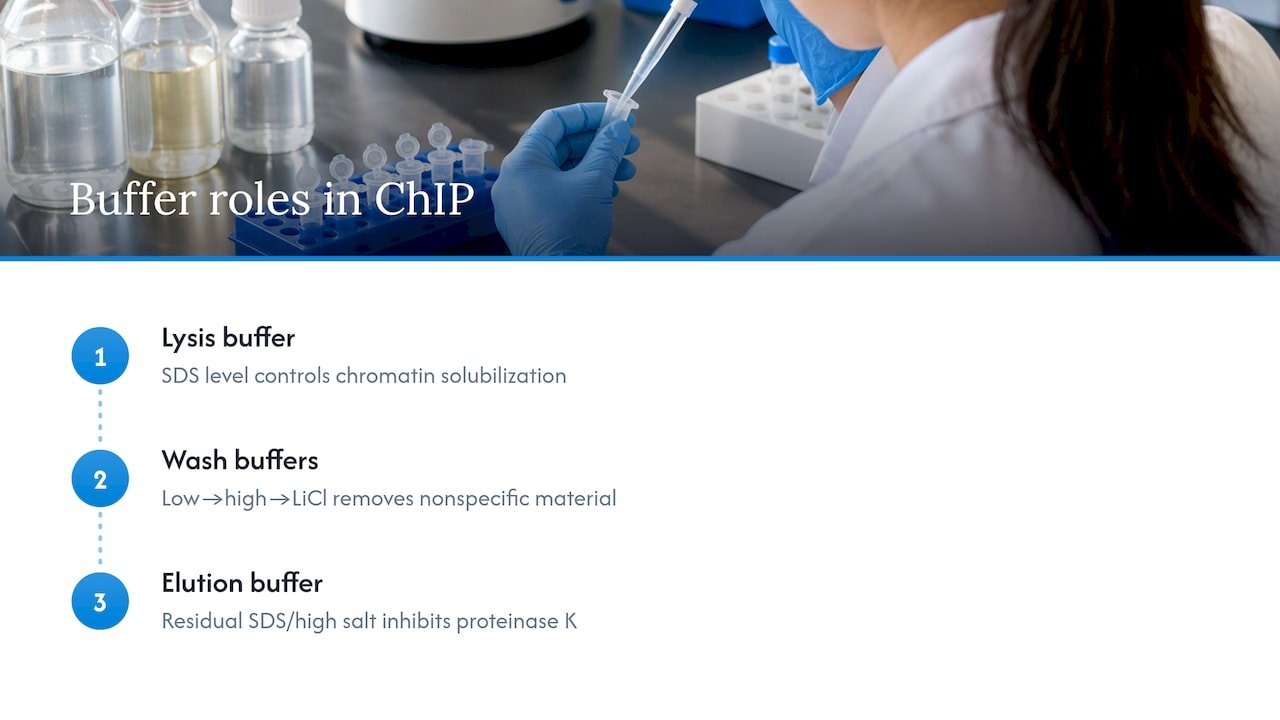
Lysis, wash, and elution buffers each solve a different problem, and getting one wrong undermines the rest of the experiment regardless of how clean your chromatin prep was. Lysis buffer composition, particularly SDS concentration, controls how completely chromatin is solubilized before immunoprecipitation. Too little SDS leaves protein aggregates that trap antibody nonspecifically; too much can denature epitopes the antibody needs to recognize.
Wash buffers are where most specificity gains or losses happen. A typical ChIP wash series moves from low-salt to high-salt to lithium chloride-containing buffers, each step stripping progressively more weakly bound and nonspecific material from the beads. Skipping a wash step or under-diluting detergent concentration is a common reason background stays high even after antibody validation checks out. Conversely, over-washing can strip genuine low-affinity binding events, which matters more for transcription factors with transient chromatin interactions than for stable structural proteins like histones.
Elution buffer composition affects the next step more than people expect: residual SDS or high salt carried into the reverse-crosslinking reaction can inhibit the proteinase K digestion that follows, leaving protein fragments that interfere with later DNA purification. Matching elution buffer to your downstream cleanup method, rather than defaulting to whatever buffer a kit happens to include, avoids compounding a buffer problem into a PCR inhibition problem two steps later.
Minimizing background noise and non-specific binding
Background in ChIP comes from a handful of repeat offenders, and most of them are fixable without redesigning the whole protocol. Non-unique or repetitive genomic sequences pull down nonspecifically regardless of antibody quality, which is one reason a mock IP control matters more in genomically complex samples than in simple cell lines.
Bead choice and blocking also matter. Pre-clearing chromatin with unconjugated beads before adding antibody-bound beads removes material that binds bead matrix rather than antibody. Blocking beads with bovine serum albumin or salmon sperm DNA reduces nonspecific adsorption, particularly in protein-rich lysates.
Incomplete reversal of formaldehyde crosslinks, protein retention in spin columns during washing, and insufficient RNase digestion are documented, specific causes of elevated ChIP background, and addressing them tends to produce a larger improvement than incrementally adjusting antibody concentration. If background persists after a tightened wash series and confirmed antibody specificity, check whether crosslinking time was excessive, since overfixation can trap a wider pool of loosely associated chromatin-binding proteins that then co-precipitate nonspecifically.
Running parallel IgG and no-antibody bead-only controls alongside your experimental IP isolates whether nonspecific binding originates from the antibody, the beads, or the chromatin prep itself, which saves time compared with troubleshooting all three at once.
Sample and reagent handling to prevent degradation
Chromatin and antibody quality degrade in ways that are easy to miss until a run fails. Crosslinked chromatin should be aliquoted and stored at negative 80 degrees Celsius rather than repeatedly freeze-thawed, since freeze-thaw cycles fragment chromatin unpredictably and compound whatever shearing happens during sonication.
Formaldehyde stock should be stored sealed and used within the window recommended by the supplier, since oxidized or diluted formaldehyde crosslinks inconsistently and is a frequent, overlooked cause of shearing problems that get misattributed to sonicator settings. Antibodies, particularly in dilute working stocks, lose activity faster than concentrated stock solutions, so aliquoting stock antibody on first thaw rather than repeatedly freeze-thawing a single tube preserves activity across a multi-month project.
Beads, particularly magnetic protein A or protein G beads, should be resuspended gently and never vortexed aggressively, since bead damage reduces binding capacity in ways that are not visible until yield drops.
Troubleshooting differences between cell lines and tissue samples
Cultured cell lines and tissue samples fail in different ways, and applying cell-line troubleshooting logic to a tissue sample often wastes time. Cell lines are homogeneous, so a failed ChIP in a cell line usually traces cleanly to one variable: antibody, chromatin prep, or buffer composition. Troubleshooting is comparatively fast because you can repeat the experiment on identical material.
Tissue samples introduce cell-type heterogeneity, which changes both the fragmentation step and the control strategy. A tissue homogenate contains multiple cell types with different chromatin accessibility, which is part of why mock IP controls are more valuable in complex tissue samples than in simple cultured cell lines: input alone cannot distinguish genuine signal from the general chromatin accessibility noise that heterogeneous tissue introduces. Dissociation efficiency also varies by tissue type, so a tissue ChIP that yields less DNA than expected should first be checked for incomplete dissociation before any antibody troubleshooting begins.
Fixation time typically needs separate optimization for tissue versus cell lines, since tissue architecture slows formaldehyde penetration compared with a monolayer or suspension culture. A fixation protocol validated on a cell line will frequently underfix or unevenly fix a tissue sample, producing exactly the inconsistent shearing pattern described earlier in fragmentation troubleshooting, but traced to a different root cause.
When to stop optimizing and change strategy
Repeat a failed ChIP once with a fresh antibody lot and corrected buffers. If the positive control still fails after that, stop iterating and validate the antibody properly, or move to epitope tagging or CUT&RUN, which can be faster and cheaper than another round of guesswork. Log every lot number and parameter, and share negative results: they save the next lab real time.
— Alina
Where to find validated antibodies and ChIP reagents
Sourcing a properly validated antibody is often faster than troubleshooting a failing one for another week. A selection of antibodies and related molecular biology reagents is available for researchers who need a new lot or an orthogonal antibody to cross-check a suspect result.

Validation data and technical support is available to assist decisions about repeating a ChIP or switching antibody sources, with current catalog listings accessible via the products page.
FAQ
What is the most common reason ChIP experiments fail?
Antibody specificity and chromatin quality are the two most common points of failure, and checking chromatin fragment size and running a pilot ChIP-qPCR with known positive-control loci catches most problems before sequencing. Antibodies with roughly fivefold or greater enrichment across multiple loci generally indicate the antibody is not the limiting factor.
Should I use mock IP or input as my ChIP control?
DNA input works well for straightforward cultured cell lines, while mock IP combined with input improves detection in complex tissue samples where chromatin accessibility varies across cell types. Choose based on sample complexity rather than defaulting to one control type for every experiment.
What FRiP, NSC, and RSC values indicate a good ChIP-seq run?
ENCODE guidelines associate a FRiP value around 1% with acceptable signal enrichment, while an NSC below 1.05 or RSC below 0.8 generally signals a dataset that should be repeated or investigated further. These metrics work alongside IDR analysis across biological replicates rather than as standalone pass or fail thresholds.
How do I remove PCR inhibitors after reverse crosslinking?
Spin-column purification after reverse crosslinking removes residual detergents and buffer components more reliably than phenol-chloroform extraction for downstream qPCR success. If purified DNA still produces no product, repeat reverse crosslinking with fresh proteinase K before suspecting the antibody.
What causes high background in ChIP experiments?
Incomplete crosslink reversal, protein retention in spin columns, non-unique genomic sequences, and insufficient RNase digestion are documented causes of elevated ChIP background. Extending RNase treatment and avoiding prolonged spin-column retention during washes are practical first fixes.
Sources
- ChIP-seq guidelines and practices of the ENCODE and modENCODE consortia | Genome Research
- A ChIP on the shoulder? Chromatin immunoprecipitation and validation strategies for ChIP antibodies – PMC