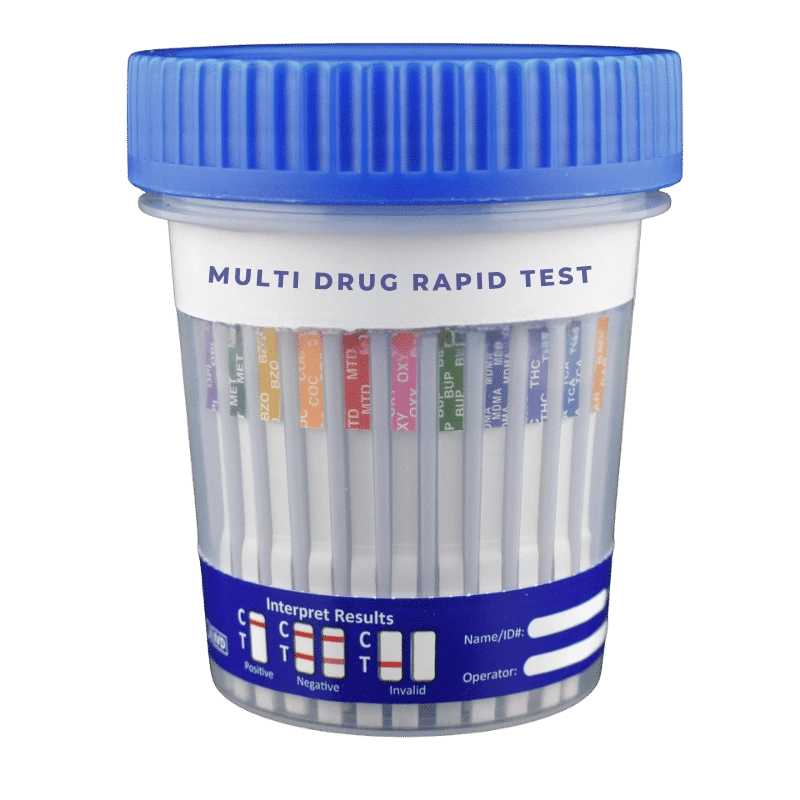

From Clusters to Bench: 12‑Virus Antigen Panel Design for Diagnostics
Design viral antigen panels by clustering candidate sequences with PAM, choosing panel size at the Shannon-entropy elbow, then filtering for antigenicity and cross-reactivity before wet-lab validation. The recommended pipeline runs computation first (clustering, entropy elbow, antigenicity scoring) and wet-lab second (synthesis, immobilization, tiered testing). Start small: a triage subset, then a 12-virus initial panel, then 6-virus clade panels or 3 to 5-target sets when resources are tight. Keep an eye on multiplex limits, target limits of detection, and sample volume from day one.
TL;DR:
- Selecting a panel size at the Shannon-entropy elbow balances capturing viral diversity while minimizing unnecessary synthesis costs.
- Clustering candidate sequences with PAM ensures representatives are real, orderable sequences, avoiding the pitfalls of synthetic averages from k-means.
- Specificity filtering with BLASTn must be repeated regularly to account for database updates and emerging viral variants that may cross-react.
- Validating detection limits, cross-reactivity, interference, and clinical concordance is essential for establishing true panel effectiveness.
- Platform constraints, such as target number limits and detection sensitivity, should guide antigen choice before finalizing the panel design.
Table of Contents
- What Does Viral Antigen Panel Design Actually Involve?
- Computational Pipeline: Algorithms, Parameters, and Practical Choices
- Antigen Candidate Selection and Wet-Lab Considerations
- How Do Assay Platforms Constrain Panel Design?
- Which Validation Metrics Actually Prove a Panel Works?
- Panel Sizing and Tiered Testing Strategy
- Practical Examples and Short Case Studies From the Literature
- Mayflower Bioscience: Reagent Mapping for Panel Prototyping
- Design Considerations for Emerging and Variant Viral Strains
- Integrating Antigen Panel Results With Patient Clinical Data
- Quality Control During Manufacturing and Storage
- Regulatory Considerations for Viral Antigen Panel Deployment
- Selected Primary Sources and Tools to Consult
- Ready to Move From Design to Bench?
- An Editorial Take on Building Antigen Panels That Actually Hold Up
- Sources
- FAQ
What Does Viral Antigen Panel Design Actually Involve?
Viral antigen panel design is the process of choosing which viral proteins or peptides to include in a diagnostic or research assay, and in what combination, so the panel detects the intended pathogens without cross-talk between targets. It sits at the intersection of bioinformatics and bench chemistry. You are not just picking antigens that look good on paper. You are picking ones that survive expression, immobilize cleanly, and behave predictably next to five or ten other targets on the same chip or in the same well.
The field has moved past manual curation. Tools like VIProDesign now handle the sequence-selection math, while frameworks like APRANK rank candidate antigens by features tied to real-world immunogenicity. Purple fills a related but distinct role, selecting unique peptides for targeted proteomics rather than whole-protein panels. Knowing when to reach for each tool, and how to hand off their output to a bench protocol, is the actual skill here.
Here is a workflow you can follow or hand to a collaborator, from defining scope to locking in a validated panel.
- Define intended use and sample type first. A panel meant for respiratory triage in an urgent care setting has different constraints than one built to map neutralizing antibody breadth across a virus’s clades. Decide whether you need serum, plasma, nasal swab eluate, or CSF, because that choice affects downstream immobilization chemistry and required sample volume.
- Assemble your sequence dataset and cut redundancy. Pull candidate protein or genome sequences from public repositories, then run CD-HIT at a 99% identity cutoff to collapse near-duplicates before clustering. Redundant sequences waste computational cycles and bias entropy calculations toward overrepresented strains.
- Prefilter for assay-friendly sequence properties. Screen for extreme GC content, long homopolymer runs, and ambiguous residues that complicate synthesis or amplification later. This step catches problems before you invest in clustering.
- Cluster with PAM and pick medoids. Partitioning Around Medoids groups similar sequences and returns actual sequences (medoids) as cluster representatives, rather than synthetic averages the way k-means would. That distinction matters because a medoid is something you can actually order and synthesize.
- Find the entropy elbow to size your panel. Calculate cumulative Shannon entropy across increasing numbers of clusters and look for the point where additional clusters stop adding meaningful diversity, a threshold VIProDesign’s methodology formalizes as the practical stopping point for panel size.
- Score candidates for antigenicity. Run an APRANK-style scoring pass that weights protein localization, repeat content, disorder, and similarity to host proteins, since these features correlate with which proteins actually provoke a detectable immune response.
- Run specificity checks with BLASTn. Screen surviving candidates against the target taxon and then against the full nucleotide database to flag fragments likely to cross-react with unrelated organisms or host sequences.
- Plan your wet-lab reagent strategy. Decide between synthesized peptides and expressed recombinant proteins, choose an expression system if needed, and select an immobilization chemistry that matches your platform.
- Build in quality control checkpoints. Set batch-to-batch consistency checks and storage stability testing before you scale production of any candidate antigen.
- Schedule validation experiments early, not last. Block out limit-of-detection testing, cross-reactivity panels, interference testing with simulated co-infections, and clinical concordance testing against ELISA, RT-PCR, or neutralization assays as part of the initial project timeline, not an afterthought once reagents are already ordered.
Treat this as a loop, not a straight line. A failed specificity check at step 7 often sends you back to step 4 with a smaller cluster count. Budget for at least one full iteration.
Computational Pipeline: Algorithms, Parameters, and Practical Choices
The computational stage is where most panel design projects either save months of bench work or waste them. Get the clustering and entropy calculations right, and your wet-lab team synthesizes candidates that actually work together. Get them wrong, and you discover the cross-reactivity problem after you have already spent budget on peptide synthesis.
Sequence preprocessing comes first, and it is more consequential than it sounds. For unusually long sequences, such as full envelope glycoprotein genes from highly variable RNA viruses, fragmenting into overlapping windows before clustering can surface region-specific diversity that whole-sequence clustering misses.
Clustering method matters more than most researchers assume going in. VIProDesign’s approach uses PAM rather than k-means specifically because PAM’s medoids are drawn directly from the input dataset. K-means centroids are averages, which means the “representative” sequence a k-means run outputs might not exist in nature and cannot be synthesized. PAM sidesteps that problem entirely, at some cost in computational speed for very large datasets.
Panel size selection follows the same entropy-elbow logic across projects, but the actual elbow point shifts depending on how genetically diverse your target virus is. A tightly conserved DNA virus might show diminishing entropy returns after just 4 or 5 clusters. A rapidly mutating RNA virus with multiple circulating clades might not plateau until 15 or 20. VIProDesign’s own validation work found that panels sized at the entropy elbow captured the bulk of sequence diversity present in the full dataset, with additional clusters beyond that point adding comparatively little coverage for the added synthesis cost.
Specificity filtering runs in two passes for a reason. The first BLASTn pass checks candidate fragments against sequences from the target taxon, confirming the fragment is actually conserved within the group you care about. The second pass checks against the full nucleotide database, catching cases where a “specific” fragment happens to share enough homology with an unrelated organism, or with a human gene, to cause false positives in a clinical sample.
A few parameter defaults hold up well across most viral panel projects:
- Keep candidate fragment GC content between 30% and 70% to avoid amplification and hybridization artifacts.
- Screen out homopolymer runs longer than 4 to 5 bases, which cause sequencing and synthesis errors.
- Weight geographic strain diversity into your input dataset if the panel needs to perform across multiple regions, not just the strains most commonly deposited from well-sequenced countries.
- Rerun BLASTn specificity checks whenever you update your reference database, since a fragment considered clean last year can become a cross-reactivity risk once a related pathogen’s sequence gets deposited.
Pro Tip: Run your entropy-elbow calculation twice, once on the full dataset and once on a version with obvious outbreak-cluster overrepresentation downweighted. Public sequence databases often over-represent whatever strain caused the most recent large outbreak, which can shift your elbow point toward that strain’s clade and under-represent quieter, still-circulating lineages.
Purple offers a complementary path when your endgame is peptide-level rather than whole-protein selection. It matches candidate peptides against background proteomes using exact and homologous matching, which is useful when you are building a targeted proteomics panel rather than a full-length antigen array. Choosing between VIProDesign-style protein panel logic and Purple-style peptide selection usually comes down to whether your assay platform reads whole proteins or short linear epitopes.
Antigen Candidate Selection and Wet-Lab Considerations
The decision between synthesizing a peptide and expressing a full recombinant protein shapes almost everything downstream, from cost to sensitivity. Peptides are cheap, fast to produce, and reproducible batch to batch, but they miss conformational epitopes entirely. If antibodies in your target population recognize a folded 3D structure rather than a short linear sequence, a peptide panel will underperform no matter how well the sequence was chosen computationally. Recombinant proteins preserve conformational and often glycosylation-dependent epitopes, which matters for many enveloped viruses, but they cost more and take longer to produce and validate.
Expression system choice adds another layer of trade-offs. Bacterial expression is fast and inexpensive but cannot glycosylate. Insect cell and mammalian expression systems support glycosylation and more native folding but add weeks to your timeline and meaningfully raise cost per milligram. For a virus where glycosylation shields or creates key epitopes, cutting corners on expression system choice can quietly sabotage assay sensitivity in ways that are hard to diagnose after the fact.
Immobilization chemistry is where a lot of otherwise well-designed panels lose sensitivity. Four main approaches dominate the field, and each carries distinct trade-offs for sensitivity and long-term stability:
- Passive adsorption is simple and cheap but can denature antigens on contact with the surface, reducing epitope availability.
- Covalent bonding gives more stable, oriented attachment but requires antigens with accessible functional groups and adds a chemistry step to your protocol.
- Affinity immobilization (streptavidin/biotin, His-tag/Ni-NTA) offers reliable orientation control and is popular for recombinant proteins engineered with a tag.
- Molecular imprinting is less common in routine diagnostics but can offer high specificity for niche applications where antibody-based capture is impractical.
Matching chemistry to platform is not optional. A microarray spotting antigens onto a glass or nitrocellulose surface has different adhesion behavior than a bead-based suspension assay, and a chemistry that works beautifully on one substrate can underperform badly on another.
Minimum antigen mass targets give you a concrete number to design around rather than guessing. Recombinant antigen microarray work has demonstrated reliable antibody detection using as little as 3 microliters of serum or CSF, with some targets, including CMV-pp150, detectable at antigen masses around 15 picograms. That gives you a practical lower bound to test against when optimizing spotting concentration: if your candidate antigen needs far more mass than that to generate a usable signal, either the antigen itself or the immobilization chemistry probably needs revisiting.
Quality control has to run continuously, not just at release. Track batch-to-batch consistency in binding signal using a reference positive control serum, monitor for antigen degradation under your intended storage conditions, and set explicit rejection criteria before you scale production. A panel that passed validation with one antigen lot can fail silently with the next lot if storage stability wasn’t characterized up front.
How Do Assay Platforms Constrain Panel Design?
Every multiplex platform imposes its own ceiling on how many targets you can run simultaneously, and that ceiling should shape your panel design decisions well before you finalize antigen selection. Microarrays offer the highest spot density, packing dozens to hundreds of antigens onto a single slide, but that density comes with real cross-reactivity risk when spots sit close together. Microfluidic immunoassays trade some of that density for tighter fluidic control and faster turnaround. Lateral flow assays (LFAs) cap out fastest of the three, typically limited to a handful of lines before readability degrades.
Multiplex pitfalls tend to cluster around the same failure modes regardless of platform:
- Signal overlap between adjacent targets, especially with fluorescent or colorimetric labels sharing similar detection wavelengths.
- Cross-reactivity between antigens that share structural homology, which no amount of clean bioinformatic filtering fully eliminates once you’re at the protein level.
- Target imbalance, where one analyte’s signal dominates and suppresses detection of a co-present lower-abundance target, a failure mode also documented in multiplex rRT-PCR kit evaluations and directly analogous to antigen assay competitive interference.
Encoded labels and automated readers address several of these problems at once. Rather than cramming more visual lines onto a single strip, designs increasingly rely on micro-regions of interest, multi-strip formats, or barcoded bead sets paired with a digital reader to expand effective multiplex capacity without sacrificing readability.
Signal amplification chemistry directly determines your achievable limit of detection. Nanozyme-based colorimetric labels and engineered nanoparticle conjugates can push detection thresholds down substantially compared to traditional colloidal gold, which matters most for low-abundance early-infection antigens where a weak true signal needs to clear the noise floor. The trade-off is usually cost per test and sometimes a longer incubation step.
Time-to-result and instrumentation footprint round out the practical constraints. A point-of-care setting needs a platform that returns results in well under an hour with minimal or no bench equipment. A reference lab running batch testing overnight can tolerate a slower, more instrumentation-heavy platform if it buys higher sensitivity or a larger multiplex count. Match the platform to where the panel will actually be deployed, not to whichever platform happens to be easiest to prototype in your own lab. Reviewing established multiplex assay principles before locking in a platform choice can save a redesign cycle later.
Which Validation Metrics Actually Prove a Panel Works?
A panel that looks clean computationally still has to prove itself against hard analytical numbers before anyone should trust it clinically. Four categories of testing carry the real weight.
- Limit of detection (LOD), measured per analyte, not just for the panel as a whole. Some targets in a multiplex panel will always be more sensitive than others, and reporting only a best-case or average LOD hides which analytes actually need improvement. Nanozyme-enhanced colorimetric microfluidic immunoassays have achieved LODs as low as 0.1 pg/mL across an 8-plex respiratory virus panel, which is a useful benchmark for what a well-optimized signal amplification chemistry can deliver.
- Cross-reactivity panels built directly from your BLASTn specificity flags. Test the finished antigen panel against serum samples known to contain antibodies to closely related, non-target pathogens, prioritizing exactly the sequences your specificity screen flagged as borderline during the computational stage.
- Interference testing that simulates realistic co-infection scenarios. A defensible protocol pairs one analyte at roughly 3 times its LOD with a second analyte at roughly 1,000 times its LOD in the same sample, mirroring the competitive-suppression testing approach used in multiplex rRT-PCR validation, to see whether a high-abundance target suppresses detection of a low-abundance one.
- Clinical concordance against an established reference method. Compare panel results to ELISA, RT-PCR, or neutralization assay results on the same clinical sample set, and report sensitivity and specificity against that reference rather than in isolation.
An 8-plex nanozyme-based microfluidic immunoassay reached a limit of detection of 0.1 pg/mL with a 40-minute total runtime, a combination that shows sub-picogram sensitivity and rapid turnaround are not mutually exclusive once signal amplification chemistry is optimized.
Skipping any one of these four categories leaves a gap a regulator, a peer reviewer, or a skeptical lab director will eventually find. Build the validation plan into your project timeline from the start rather than treating it as a final checkbox.
Panel Sizing and Tiered Testing Strategy
Panel size is not a single number you pick once. It’s a tiered decision that depends on whether you need speed, breadth, or depth at any given stage of a project.
- Tier 1, triage: A small, high-throughput screening set designed to flag likely-positive samples fast, prioritizing turnaround time over exhaustive coverage.
- Tier 2, initial breadth panel: Roughly 12 viruses per major genetic subtype, sized to give a reasonable first estimate of immune response breadth without the cost of testing every known strain.
- Tier 3, clade-level detail: smaller sets of several viruses per heterotypic clade, used when Tier 2 results suggest a need for finer resolution within a specific viral subgroup.
- Resource-limited subsets: When budget or sample volume caps testing at 3 to 5 targets, prioritize the highest-entropy-elbow representatives from your Tier 2 panel rather than an arbitrary subset, preserving as much of the original diversity signal as the reduced panel size allows.
This tiered structure, validated in standardized neutralizing antibody panel design work, lets a lab scale testing depth to match sample availability and project urgency without redesigning the panel from scratch at each stage. Start broad only when the question demands it; most diagnostic use cases never need beyond Tier 2.
Practical Examples and Short Case Studies From the Literature
Two published examples show what design-to-validation actually looks like in practice, and both point to the same lesson: sample volume and antigen mass targets are not incidental details, they are design constraints that shape everything upstream.
- Recombinant antigen microarray: Detected multiple viral antibodies using just 3 microliters of serum or CSF per sample, with some antigens (CMV-pp150) giving usable signal at masses around 15 picograms. The sensitivity-specificity trade-off showed up most clearly on antigens with partial sequence homology to related herpesviruses, underscoring why specificity screening matters even for well-characterized targets.
- Nanozyme microfluidic immunoassay: An 8-plex respiratory virus panel achieved a 0.1 pg/mL limit of detection with a 40-minute total runtime, demonstrating that colorimetric nanozyme labels can rival fluorescent detection sensitivity while keeping the workflow simple enough for near-point-of-care use.
The transferable lesson: both examples optimized one dominant constraint (sample volume in the first, turnaround time in the second) rather than trying to maximize every parameter at once. When adapting either approach to a new panel, decide which single constraint matters most for your intended use case before optimizing anything else.
Mayflower Bioscience: Reagent Mapping for Panel Prototyping
Turning a computationally validated candidate list into bench-ready reagents means sourcing antigens and controls that match your panel design, not settling for whatever happens to be in stock. Mayflowerbio’s catalog includes reagents built for exactly this stage: a CMV pp65 peptide pool for immunological evaluation work, nucleocapsid protein options across several viral families, and a broader line of infectious disease antibodies useful as positive controls or reference standards during specificity testing.
Because sourcing delays are one of the most common reasons a validation timeline slips, US-based customer support for procurement and technical questions can help labs move from finalized candidate list to ordered reagents without waiting on an overseas supplier’s business hours. That matters most at the exact moment a specificity flag sends you back to reorder a substitute antigen mid-project.
Design Considerations for Emerging and Variant Viral Strains
A panel designed around today’s circulating strains has a shelf life, and that shelf life shortens for any virus prone to rapid antigenic drift. The practical fix is building strain turnover into the computational pipeline itself rather than treating variant emergence as a future problem.
Rerun your clustering and entropy-elbow calculation on a rolling basis as new sequences get deposited into public repositories, rather than treating the original panel design as final. For fast-evolving RNA viruses, a panel locked in even 18 months earlier can miss a clade that has since become dominant in circulation. Weighting your input sequence dataset toward recent deposits, while still retaining enough historical diversity to catch persistent minor lineages, keeps the panel relevant without constant full redesigns.
Cross-reactivity risk also shifts as variants emerge. A specificity check that passed cleanly against last year’s reference database can fail once a new variant’s sequence, sharing partial homology with your candidate antigen, gets deposited. Build a recurring BLASTn rerun into your maintenance schedule rather than treating specificity screening as a one-time gate before production.
For panels intended to track neutralizing antibody breadth specifically, the tiered clade-panel structure described earlier does double duty here. Because Tier 3’s six-virus clade panels are explicitly organized around genetic subgroups, adding a newly significant clade to that tier is a smaller, faster update than redesigning the full panel from scratch.
Integrating Antigen Panel Results With Patient Clinical Data
A panel’s raw signal output, whether that’s a fluorescence intensity, a colorimetric reading, or a binary positive/negative call, only becomes clinically useful once it is linked to the patient record it came from. That linkage has to happen at the data-architecture level, not as an afterthought during analysis.
Most labs handle this through a laboratory information system (LIS) that maps each sample barcode to both the assay’s raw output and the patient’s existing clinical variables: symptom onset date, prior vaccination or infection history, and any concurrent test results. Timestamping matters more than it seems. A positive antigen result interpreted without knowing days-since-symptom-onset can be read as a false negative when it’s actually a sample drawn outside the antigen’s detectable window.
For research panels tracking neutralizing antibody breadth rather than acute diagnosis, integration usually means merging panel titers with longitudinal clinical metadata, vaccination timing, prior exposure history, demographic variables, in a structured database that supports statistical modeling of breadth against those covariates. Keeping antigen-level results (not just a summary panel score) in that merged dataset preserves the ability to ask which specific antigens drove a given breadth result later, which a collapsed summary score would permanently hide.
Whichever system you use, validate the data pipeline itself, not just the assay. A perfectly designed panel produces useless clinical insight if a sample ID gets mismatched to the wrong patient record somewhere between the reader and the database.
Quality Control During Manufacturing and Storage
Panel performance degrades quietly if quality control stops at the release testing stage. Antigen stability, coating consistency, and storage conditions all drift over a product’s shelf life in ways that don’t show up until a batch fails in the field.
Batch-release testing should include a reference positive control run against every new antigen lot, comparing signal intensity to an established acceptance range rather than just confirming a signal exists.
Storage stability testing needs to mirror real shipping and use conditions, not just ideal lab freezer storage. Run accelerated stability studies at elevated temperatures to project shelf life, and separately validate performance after simulated shipping conditions (temperature excursions, multiple freeze-thaw cycles) if the panel will ship outside a controlled cold chain. Immobilized antigens on a coated surface, whether microarray slide or microplate well, are particularly prone to slow signal loss from surface degradation that a single-timepoint QC check won’t catch.
Document lot-to-lot variability explicitly rather than assuming consistency. Two production runs of the same recombinant antigen, even from the same expression construct, can differ meaningfully in glycosylation pattern or folding efficiency depending on culture conditions. Tracking that variability against clinical performance over time, not just analytical signal strength, is what separates a QC program that catches real problems from one that only rubber-stamps release paperwork.
Regulatory Considerations for Viral Antigen Panel Deployment
Regulatory pathway depends heavily on intended use, and that distinction should shape design decisions well before a panel reaches the validation stage. A panel intended purely for research use, characterizing immune response breadth in a vaccine study, for instance, faces different requirements than one intended for clinical diagnostic deployment.
For panels headed toward clinical use in the United States, expect FDA oversight through either the traditional premarket pathway or, for qualifying point-of-care tests, a CLIA-waiver pathway that requires demonstrating the assay is simple enough and low-risk enough for use outside a certified clinical laboratory. The interference and cross-reactivity testing described earlier in this article isn’t just good scientific practice, it’s the kind of evidence a regulatory submission will specifically require, documented against realistic co-infection and near-neighbor pathogen scenarios rather than idealized single-analyte conditions.
Research-use-only (RUO) panels carry lighter regulatory burden but still need clear labeling indicating they are not validated for clinical diagnostic decisions, and using an RUO-labeled panel to inform patient care decisions creates real liability exposure regardless of how well the underlying science performs.
International deployment adds another layer, since a panel cleared for one regulatory jurisdiction is not automatically valid in another. If a panel is intended for multi-region use, factor country-specific regulatory review timelines into the project schedule early, since these can add months compared to a single-jurisdiction submission.
Selected Primary Sources and Tools to Consult
A short working library covers most of what a design team needs at each pipeline stage:
- VIProDesign, for the PAM clustering and entropy-elbow methodology behind representative panel selection and practical panel sizing.
- APRANK, for a feature-based antigenicity scoring approach that prioritizes candidates before committing to synthesis.
- Purple, for taxon-specific peptide selection when the endgame is targeted proteomics rather than whole-protein panels.
- Platform-specific validation literature, including nanozyme microfluidic immunoassay performance data and recombinant antigen microarray sensitivity benchmarks, for setting realistic LOD and sample-volume expectations before finalizing a platform choice.
Keep this list handy during the design phase rather than reaching for individual papers only when a specific problem comes up. Reading APRANK’s feature list before finalizing your candidate shortlist, for instance, often catches antigenicity concerns that a pure sequence-conservation filter would miss entirely.
Ready to Move From Design to Bench?
Getting from a validated candidate list to an actual working assay depends on sourcing reagents that match the design, not settling for a near-fit that forces a late-stage redesign. Mayflowerbio’s bioassay catalog covers multiplex-ready formats suited to the platform trade-offs discussed above, and the AimPlex multiplex assay line gives labs a practical starting point for prototyping a panel before committing to a fully custom build.
If your project calls for specific infectious disease antibody controls or reference reagents during specificity and interference testing, browse Mayflowerbio’s infectious disease antibody catalog or reach out through the site’s contact form for guidance on matching a reagent to your panel’s exact target list. US-based technical support means a question about a specific lot or a substitution recommendation gets answered without the delay of an overseas supplier’s time zone.
An Editorial Take on Building Antigen Panels That Actually Hold Up
The conventional advice in this space still treats computational panel design and wet-lab validation as sequential, almost separate, projects. That’s backwards, and it’s the single biggest reason panels fail late instead of early. The clustering and entropy-elbow math from tools like VIProDesign is only as good as the antigenicity and cross-reactivity filters layered on top of it, and those filters only earn their keep once you’ve watched a supposedly clean candidate flunk a real interference test.
What gets underrated is how much platform choice should constrain candidate selection, not follow it. Picking your antigens first and shopping for a platform after is how labs end up trying to force a conformational-epitope-dependent protein onto a peptide-friendly LFA format. Decide the platform’s physical and chemical limits before you finalize which candidates survive the computational filter.
If there’s one place to spend disproportionate effort, it’s interference testing with realistic co-infection ratios. Sequence-level specificity checks catch a lot, but they miss the competitive suppression that only shows up once two real analytes share a well. That gap is where clean-looking panels quietly underperform in the field.
— Alina
This article is general information, not a substitute for advice from a qualified doctor. Consult a qualified healthcare professional about your own circumstances before acting on anything here.
Sources
- Multiplexed detection of eight respiratory viruses based on nanozyme colorimetric microfluidic immunoassay
- Development of Recombinant Antigen Array for Simultaneous Detection of Viral Antibodies
- Recommendations for the Design and Use of Standard Virus Panels To Assess Neutralizing Antibody Responses
- VIProDesign: Viral Protein Panel Design for Highly Variable Viruses to Evaluate Immune Responses and Identify Broadly Neutralizing Antibodies
- APRANK: Antigenic protein and peptide ranker for large-scale antigen prioritization
FAQ
What Viruses Show Up on a PCR Test?
A PCR test detects the specific viral genetic targets it was designed for, commonly respiratory viruses like influenza A and B, RSV, and SARS-CoV-2 in a respiratory panel, though the exact target list depends entirely on which panel or assay is used.
How Much Does a Full Respiratory Viral Panel Cost?
Cost varies widely by lab, target count, and platform, and no single published figure applies universally, so check directly with the testing lab or manufacturer for current panel pricing.
How Long Does It Take to Get Viral Panel Results?
Turnaround depends heavily on platform: some multiplex immunoassay formats have demonstrated results in about 40 minutes, while lab-based PCR panels processed in batches often take hours to a day or more depending on the facility’s workflow.
What Is a Viral PCR Test?
A viral PCR test amplifies a specific segment of a virus’s genetic material to detect its presence in a sample, which differs from an antigen panel that instead detects viral proteins directly using antibody-based or affinity-based capture methods.
How Many Antigens Should a Diagnostic Panel Include?
It depends on intended use: an initial breadth panel commonly targets around 12 viruses per major subtype, while more resource-limited or triage-focused panels use smaller sets of 3 to 6 targets chosen to preserve as much diversity coverage as possible.