ChIP Sonication Optimization for Labs: 100–300 bp With Less Energy
For ChIP-seq, aim for sheared chromatin of roughly 100–300 bp, and reach it with the least energy that works: aliquot your fixed sample, run a short pilot time-course on ice, and check each point by gel or Bioanalyzer before you commit the full sample. Prefer a closed-tube water-bath or focused ultrasonicator when you need reproducibility across tubes. Some histone marks tolerate 200–600 bp.
TL;DR:
- Run a pilot on identical aliquots, testing every 5 to 7 cycles, and choose the earliest point that reaches 100–300 bp before using antibody.
- For transcription factors, favor 100–300 bp; some histone marks tolerate 200–600 bp, so separate shearing depths may suit mixed targets.
- Keep fixation time, cell concentration, buffer, volume, and tube type consistent; increasing cell concentration can exponentially increase required cycles, and cell types need different settings.
- For multiple samples, use a closed tube water bath or focused ultrasonicator; keep the bath near 4°C and verify fragments before immunoprecipitation.
- When DNA is too scarce to visualize, pool identical tubes after sonication and optimize with a dummy sample before confirming the setting on precious material.
Table of Contents
- Why fragment size decides ChIP and ChIP-seq quality
- Fixation and sample prep that change how chromatin shears
- Sonicator types, starting settings and what each class is good for
- A time-course optimization protocol you can run this afternoon
- Buffer, volume, tubes and temperature control
- How to assess fragmentation and gate samples before the IP
- Troubleshooting under-shearing, over-shearing, smears and heating
- Primary tissues, low-input samples and fragile protein complexes
- Alina’s view: habits that make sonication reproducible
- Where we can support your chromatin workflow
- FAQ
- Sources
Why fragment size decides ChIP and ChIP-seq quality
Many groups recommend 150 and 300 bp fragments for high-resolution ChIP-seq, and 100–300 bp is the practical target we work toward. Fragment length sets mapping resolution: a 1 kb fragment can pull down signal from a binding event several hundred base pairs away, while a 200 bp fragment pins it down. It also sets library insert size, which determines how efficiently your reads map and how much of your sequencing budget goes to informative sequence.
The relationship is not simply “smaller is better.” A systematic study found that sonication level strongly affects ChIP-seq quality, with over-sonication reducing data quality and average input fragment sizes around 200–250 bp tracking with better outcomes. Under-sonication, in the same work, hit some transcription factors harder than others. So the goal is a controlled distribution, not the smallest possible one.
Use these decision rules after your first gel:
- Accept when the bulk of the smear sits inside your target window with a tight lower edge and little material above 500 bp.
- Re-optimize when the smear centers above 400 bp or a large fraction runs below 100 bp. Change cycle number first, power second.
- Split the strategy when you study both transcription factors and broad histone marks. Factors generally benefit from the tighter 100–300 bp range, while some histone marks give good data at 200–600 bp, so you may run two shearing depths from the same fixed material.
- Reject when you see a high-molecular-weight band stuck in the well, which signals incomplete lysis or inadequate shearing rather than a distribution problem.
Over-shearing costs you twice. Over-sonication can compromise downstream immunoprecipitation, so check fragment sizes before using antibody. Under-shearing keeps resolution low and makes background worse, since large crosslinked complexes carry along neighboring chromatin. Both failure modes show up later as weak peaks or low FRiP, which is why we gate on fragment size before spending antibody on the IP.
Fixation and sample prep that change how chromatin shears
Standard formaldehyde fixation is the right default, and the most useful thing you can do is hold it constant. Fixation time can affect how much energy you need. Keep it constant during optimization, and re-run the pilot if you change it. If you change fixation time between replicates, you have changed your sonication optimum without noticing.
Upstream steps matter just as much:
- Nuclei isolation. When your sample carries debris, cytoplasmic carryover or mixed cell states, isolating nuclei before sonication removes the variability that otherwise shows up as inconsistent shearing between tubes.
- Dissociation quality. Clumped cells shear unevenly because energy reaches the clump surface first. Resuspend to a single-cell suspension before fixing.
- Cell concentration. This is the variable people underestimate. Raising cell concentration produces an exponential increase in the cycles needed to reach the same fragmentation. Fix your cells-per-volume at the optimization stage and never change it silently at the production stage.
- Cell type. The same guide gives an example under identical power settings: mouse splenocytes may need about 35 cycles where 3T3 cells reach a similar size in about 15. A protocol that works in one line is a starting point in another, never a guarantee.
- Additional crosslinkers. Dual-crosslinking approaches can help capture indirect or weak chromatin associations, but they make chromatin harder to shear. If you add one, re-run the pilot rather than reusing your old cycle count.
We recommend you do not commit your whole sample to a single fixation and sonication combination. Fix a surplus, split it into small aliquots, and test combinations on those aliquots first. A tube you sacrifice to learn the right setting costs far less than a full prep that over-shears.
Pro Tip: Fix once, in a single batch, then freeze pellets in identical aliquots. Every later optimization and production run then starts from chromatin with the same crosslinking history.
Sonicator types, starting settings and what each class is good for
Three device classes cover most labs. The choice affects reproducibility more than raw shearing power.
- Probe sonicators. A tip sits directly in a single sample, delivering high power and fast shearing. The tradeoffs are real: they generate more heat, foam easily, risk cross-contamination between samples, and process one tube at a time. They suit single, larger-volume samples where speed matters and you can manage temperature closely. Probe placement in the liquid and short pauses on ice are the practical details that keep mixing efficient and heating low.
- Water-bath and closed-tube systems. Energy reaches sealed tubes through a chilled bath, so there is no probe to contaminate, and several tubes run together. Many cores recommend closed-tube sonicators for consistent fragmentation and reduced cross-contamination compared with probes. This is the class we point most labs toward when they process multiple samples or want reproducibility between runs.
- Focused ultrasonicators. These deliver tightly controlled acoustic energy and suit low-input work and workflows that need repeatability, including sonication-assisted nuclei extraction. Commonly used instruments across core facilities include probe sonicators, water-bath systems and focused ultrasonicators, and the same group recommends a time-course starting from low power and minimal duration.
Translate class into testable parameters. For water-bath systems, protocols commonly use 30 s on and 30 s off cycles, tested in multiples of 5–7 cycles. For probe devices, use short pulses with generous rests, since continuous output heats the sample quickly. Escalate in small steps, never in one jump: add cycles, check size, add more only if the distribution still sits too high.
Whatever you choose, treat the manufacturer’s default program as a hypothesis. Your cell type, concentration and fixation determine the real optimum, which is exactly why the pilot below comes before every new project.
A time-course optimization protocol you can run this afternoon
This pilot finds the minimal effective sonication for your specific sample. It costs a handful of aliquots and a gel, and it saves you from guessing. The core logic is well established: before the IP, verify chromatin quality with a time series on small aliquots rather than risking the whole sample.
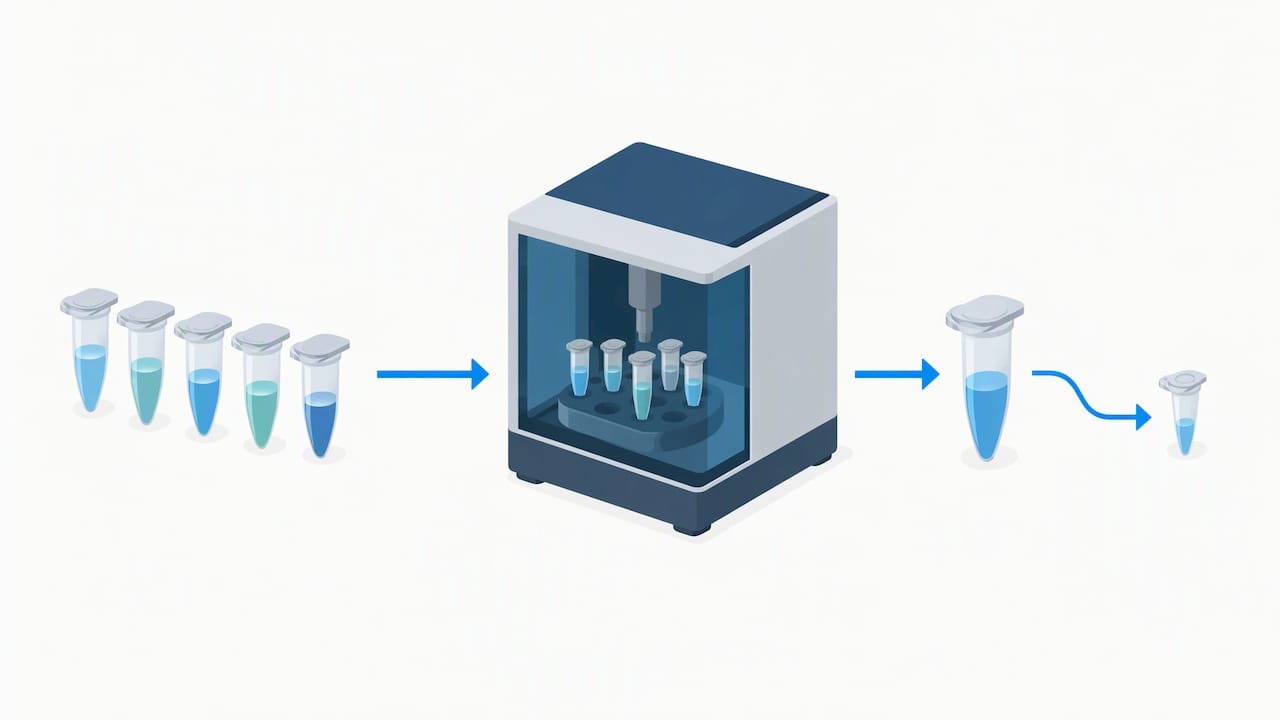
- Prepare identical aliquots. Use fixed, lysed chromatin at your production cell concentration, split into tubes of the same volume. For water-bath formats we use roughly 500 µL per tube, and we keep the cell count identical across tubes because concentration changes the answer.
- Set the schedule. For a water-bath device, run 30 s on and 30 s off at your standard power. Plan test points at multiples of 5–7 cycles, for example 5, 10, 15, 20 and 30. Published protocols aiming for 200–500 bp report test ranges of 10–30 cycles depending on cell type and device. For probe devices, use shorter pulses and a similar stepwise escalation.
- Hold the temperature. Keep the bath near 4°C and add fresh ice as it warms, roughly every 5–7 minutes. Spin tubes briefly between cycle blocks so liquid returns to the bottom and every cycle delivers comparable energy.
- Pull a test aliquot at each point. Remove a small volume at every time point, leaving the rest in the device if you are running a continuous series, or run separate tubes per time point if you prefer cleaner replicates.
- Reverse crosslinks and purify. Treat the aliquots with proteinase K, reverse crosslinks, and purify the DNA so the gel reflects true fragment length.
- Read the distribution. Run each point on an agarose gel or a Bioanalyzer, with a ladder that resolves below 500 bp.
- Choose the minimal effective point. Select the earliest time point whose distribution falls in your target window. Do not pick the point with the smallest fragments.
The decision rule in step 7 is the heart of the method. Each extra cycle adds energy, and energy damages protein epitopes and risks heating. The earliest point that reaches 100–300 bp (or 200–250 bp as an average) preserves the most antigen for the IP. Over-sonication is the failure we see labs create for themselves most often, usually by “playing it safe” with extra cycles.
Once you have your number, lock it in your log together with cell count, volume, tube type and bath position, then reuse it only for samples that match those conditions.
Pro Tip: Run your pilot on a disposable “dummy” fixed sample when precious material is scarce. Optimize on the dummy, then apply the cycle count to the real sample with a single confirmation aliquot.
Buffer, volume, tubes and temperature control
Sonication buffer composition influences both shearing and the downstream IP. Buffer composition can affect shearing and downstream immunoprecipitation, so follow a validated protocol for your buffer and dilution conditions. Published protocols use buffers containing EDTA, EGTA and HEPES, and note that buffer composition and bead additions affect shearing. Keep your buffer identical between optimization and production runs.
Practical rules we apply at the bench:
- Volume per tube. About 500 µL performs well in water-bath formats because the liquid column sits where energy is most uniform. Smaller volumes suit probe use, where the tip must stay submerged without touching the tube wall.
- Tube choice. Use the tube type your device was validated for, and keep it consistent between optimization and production runs.
- Position. Rotate tubes through the carousel or rack between runs and note each tube’s position in your log. Positional variability is real, and recording it is the cheapest way to catch it.
- Spin between cycles. A brief spin returns liquid to the tube bottom so every cycle exposes the same volume to the same energy.
- Temperature workflow. Start the bath near 4°C, add ice every few cycles, and replenish as it warms. Excessive heating can compromise sample quality, so keep samples cool and verify fragmentation before proceeding to IP.
Temperature deserves its own discipline. The same guide that documents cell-type differences calls temperature a critical variable: actively add ice, hold the water bath around 4°C, and quick-spin samples between cycles. Treat the thermometer as part of the instrument.
Key point: Sonication must be empirically optimized for every unique cell type and condition. A cycle count from another lab or another line is a hypothesis, never a setting.
How to assess fragmentation and gate samples before the IP
Assessment is where optimization becomes a decision. Two readouts cover almost every lab.
- Agarose gel. Run reverse-crosslinked, purified DNA on a gel with a ladder that resolves well below 500 bp and resolves the region of interest. Read the smear, not a band: you want most intensity inside your target window, a clean lower edge, and little signal in the well or above 500 bp.
- Bioanalyzer or Fragment Analyzer. Capillary traces give an average fragment size and a distribution shape you can compare run to run. This is the better option when you need numbers for your log, since a gel is a visual judgment while a trace gives you a reproducible value.
Use pass and fail rules so the decision does not drift with mood or deadline:
- Pass: average size in the 100–300 bp window (around 200–250 bp is where the strongest data associate with better ChIP-seq performance, as measured input sizes correlated with better performance), tight distribution, no well-stuck material.
- Marginal: a long upper tail above 500 bp. Add cycles in small steps and re-test on a fresh aliquot.
- Fail: a dominant peak below 100 bp, or a distribution so broad no window captures it. Re-optimize before any antibody is used.
Aim to avoid extremes in both directions, since both ends depress downstream metrics such as FRiP. If you cannot see DNA at all because your cell number is low, use the pooled approach: for small cell numbers, run multiple identical tubes and pool them after sonication so you have enough DNA to visualize. Because the pooled tubes received the same treatment, the gel tells you about the tube you intend to use for the IP.
Troubleshooting under-shearing, over-shearing, smears and heating
Work through failures in a fixed order: detect the failure mode, check the likely causes, apply one correction, and re-test on a fresh aliquot. Change a single variable at a time, or you will not know what fixed it.
- Under-sheared (dominant signal above 500 bp or in the well). Check cell concentration first, since it drives cycle number exponentially. Then check tube placement and volume, then power settings. Only then add cycles, in steps of 5–7.
- Over-sheared (peak below 100 bp, weak IP). Lower the energy: drop cycles, shorten pulses or reduce power. If your target is a large protein complex, move to the hybrid approach in the next section instead of simply sonicating less.
- Heavy smear with no clear center. This often points to uneven sample handling: clumped cells, mixed cell states, or foaming. Re-dissociate, isolate nuclei, and avoid introducing bubbles.
- Gaps or uneven bands between tubes. Suspect positional variability or inconsistent volumes. Rotate tubes, standardize volume, and confirm the device carousel holds each tube at the same depth.
- Warm samples or inconsistent results across a run. Replenish ice, confirm the bath temperature, and restore the quick spins between cycle blocks. Heating artifacts masquerade as shearing problems.
- Cannot tell whether the sample or the device is the problem. Run a pooled control and a dummy sample alongside your real tube. If the dummy shears as expected and your sample does not, the cause is the sample. If both fail, look at the equipment.
Remember that primary cells generally need more cycles than cultured lines, which means a protocol tuned on a line will under-shear primary material until you re-optimize.
Pro Tip: Before you blame the sonicator, check what changed. A new buffer lot, a different tube brand, a different cell count or a new fixation time explains most “mysterious” shifts in shearing.
Primary tissues, low-input samples and fragile protein complexes
Hard samples need adjusted workflows, not just more energy.
- Sonication-assisted nuclei extraction. The NEXSON approach improves reproducibility across cell types and reduces the need to re-optimize sonication for each one. It also enables lower-input ChIP-seq by standardizing nuclei extraction. If you routinely switch between cell types, this is the strongest argument for standardizing upstream.
- Pooled and dummy samples for low input. When material is too scarce to visualize, pool identical tubes after sonication so a gel is possible, and use a dummy sample for optimization so precious chromatin goes only to the IP.
- Minimal sonication plus benzonase. For high-molecular-weight proteins sensitive to prolonged sonication, use brief sonication to lyse and solubilize, then enzymatic digestion such as benzonase to reach the desired fragment sizes. This preserves protein integrity while still giving you usable chromatin.
- Dense cultures and tissues. Dissociate thoroughly, expect to use more cycles than for cultured lines, and verify with a pilot at the actual cell density. Primary material is where the time-course pays for itself fastest.
- Transcription factors versus histone marks. Factors generally favor sonication of crosslinked chromatin, while histone marks can use MNase, so your target should guide whether you sonicate at all.
In every special case, the principle stays the same: prove the shearing on a small aliquot, then scale.
Alina’s view: habits that make sonication reproducible
Most sonication failures I see are not technical mysteries. They are undocumented changes. A new tube lot, a warmer bath, a different cell density, and suddenly last month’s protocol does not work. The fix is boring: keep a sonication log and treat it as part of the experiment.
Record the device and program, cycle count, cell number, volume, tube type, tube position, bath temperature and the resulting fragment size every time. After a few runs the log tells you what your system actually does, and it lets you spot drift before it ruins an IP. I also keep a standing optimization sheet per cell type, so a new project starts from a documented baseline instead of a guess.
Gate everything on QC. A quick pilot before a large experiment is cheap, and skipping it is the expensive mistake. And resist the urge to “make sure” by adding cycles. The minimal effective energy is the right target because it protects the protein you came to pull down. Conventional wisdom says more shearing is safer. In practice, more shearing is how good samples quietly become bad data.
— Alina
Where we can support your chromatin workflow
If you would rather lean on a vendor than assemble every reagent yourself, we can help you equip and troubleshoot a chromatin workflow. Our US-based team handles reagent selection and technical questions directly, which is useful when your project is low-input or your sample type is unfamiliar.

Here is what we offer for labs working with chromatin and epigenetics:
- ChIP kits and reagents for epigenetic research
- Antibodies for immunoprecipitation workflows
- Cell biology tools, including cell counting, so you can fix your cell concentration before every optimization run
- Technical guidance on reagent choice and workflow setup
For current pricing, see our products page. Browse the full range on our products page, or contact us with your sample type and target, and we will help you choose reagents that fit your optimization plan.
FAQ
What fragment size should I aim for in ChIP-seq?
Aim for roughly 100–300 bp for high-resolution ChIP-seq. Many groups recommend 150 to 300 bp fragments, and some histone marks tolerate broader distributions. Confirm the size on a gel or Bioanalyzer before the IP.
How many sonication cycles do I need?
It depends on cell type, cell concentration and device, so run a pilot. Published protocols report test ranges of 10–30 cycles for 200–500 bp. Test in multiples of 5–7 cycles and choose the earliest point that reaches your target.
Does over-sonication really hurt ChIP-seq data?
Yes. A systematic study found that over-sonication reduced ChIP-seq data quality, while under-sonication affected some transcription factors more than others. Monitoring chromatin size before the IP improves reproducibility.
Why does my sonication work one day and fail the next?
Usually a variable changed: cell concentration, bath temperature, tube type, volume or fixation time. Cell concentration is the most common culprit, since it drives the cycles needed upward steeply. Check your log and restore the previous conditions before changing the program.
How do I optimize with very few cells?
Use identical dummy tubes and pool them after sonication so you can see the DNA on a gel. Then apply the validated cycle count to your real sample with one confirmation aliquot. Nuclei-extraction approaches can also reduce re-optimization for low-input work.